Welcome to the next wave of ProTips features in which we ask some of New Eden’s best pilots to give us the benefit of their knowledge and expertise. In the past we’ve covered how to handle the various ship classes and weapons loadouts, this time we’re going to give you an insight into tackling each and every one of Valkyrie’s six maps from the point of view of a ship specialist. What follows is a guide to the maps for would-be Heavy craft pilots, and who better to approach than Heavy stalwart, Nydwen?
Over to you Nydders (can we call you that?).
General Guidance
With the recent launch of the Wormholes and the accompanying rebalance pass, this is the perfect opportunity to take a look at the maps from a Heavy perspective and see how we can use the maps themselves to provide an extra advantage.
This guide can be used by all Heavies other than the missile variants, as they require a different approach.
I have used the control points A, B and C that are present in Carrier Assault and Control to best describe the locations, so familiarize yourself with the locations of these fixed points to better understand the advice given here. In Team Deathmatch mode, the match will invariably end with a death ball of ships, and in these cases you must keep some form of cover nearby at all times.
With that said, let’s take a look at what we have in our locker…
Shipyard
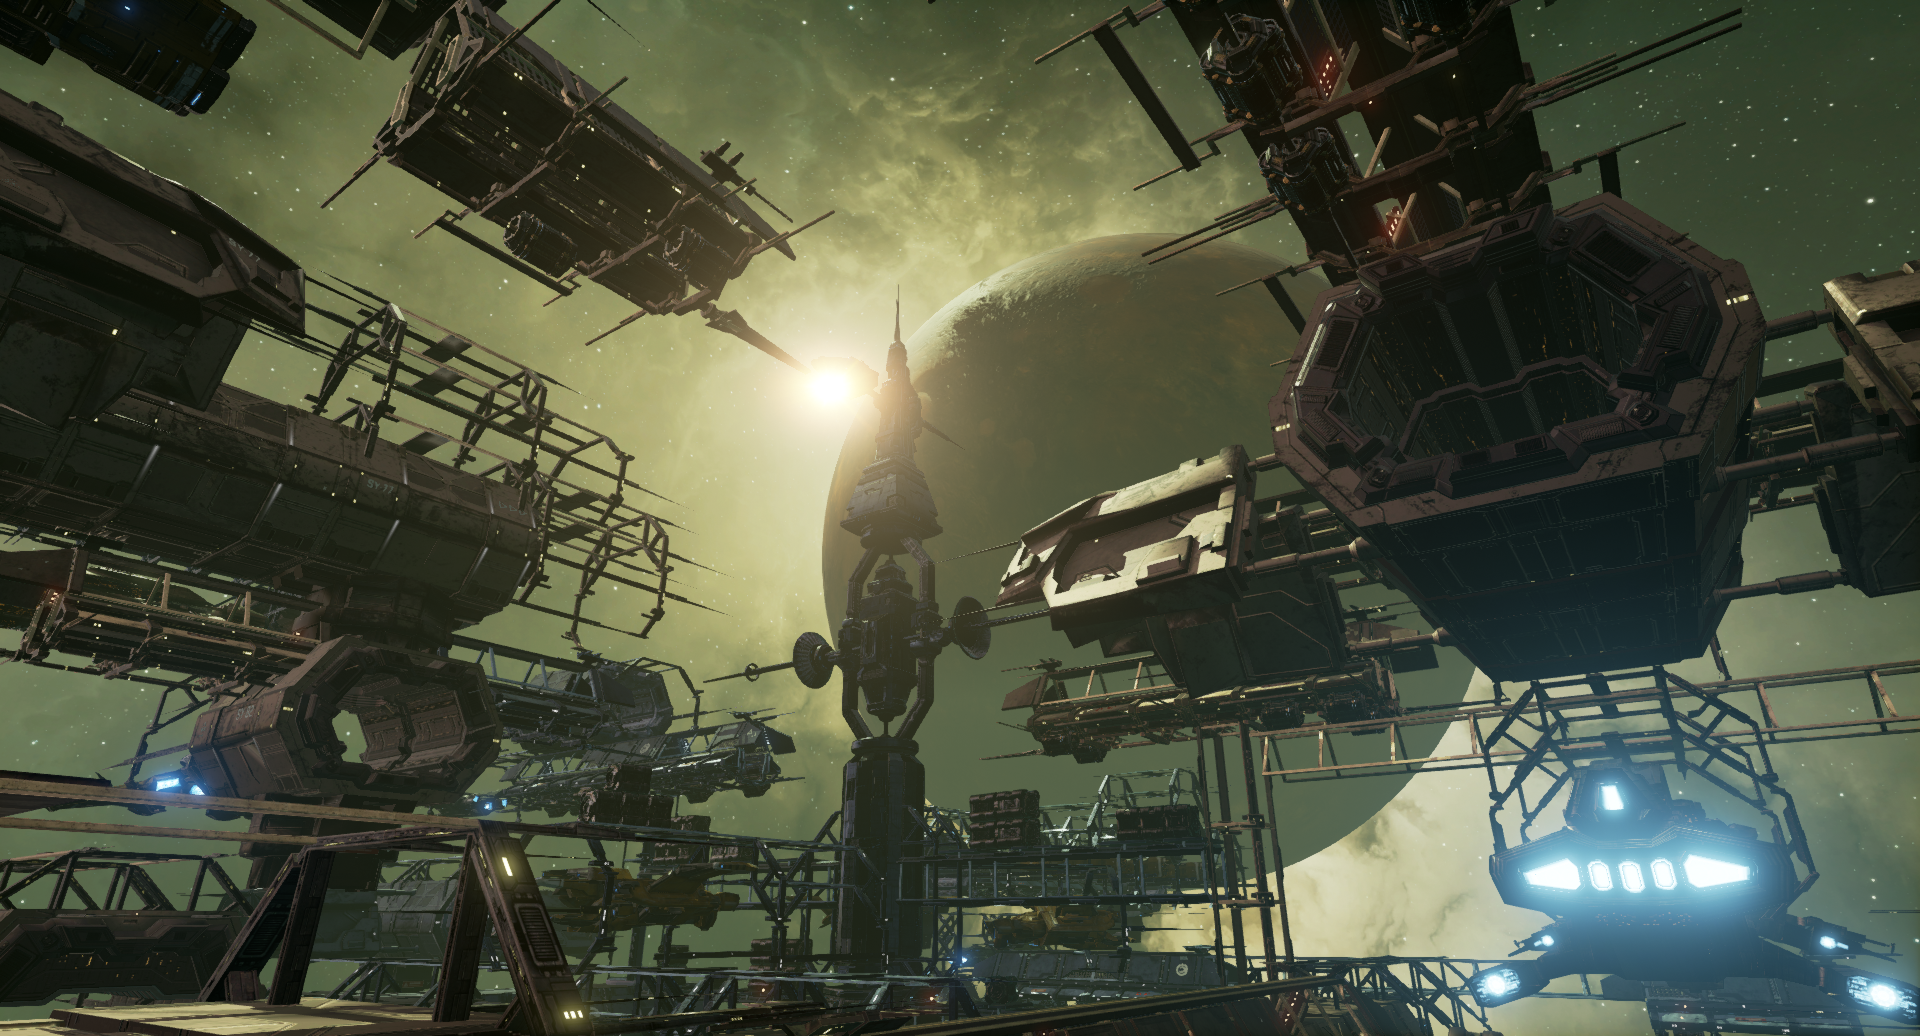 This is one of my two favorite maps. Shipyard is built up from intricate tunnels and beams which you can use to break missile locks and evade targets.
Depending on which side you spawn on, this will affect which point you should attack first.
This is one of my two favorite maps. Shipyard is built up from intricate tunnels and beams which you can use to break missile locks and evade targets.
Depending on which side you spawn on, this will affect which point you should attack first.
Point A is a great place to defend, right next to the capture point is a narrow tunnel in which you can place a drone, and then sweep around in circles inside until the point captures. Ideally, you want to draw an enemy into this tunnel, as the walls help to concentrate the damage onto the target depending on how close you can get them to the walls. If you spawn close to point A, I would recommend taking this point first and then moving onto point B.
If you happen to spawn on the other side of the map, I recommend taking point B first. This is the point where the majority of battles occur at and, again, it has a tunnel you can fight in around the control point. This tunnel is much wider than at point A, but the same principles apply.
Point C tends to be more open on this map, although you can fly underneath to hide drones. This is probably the hardest point to defend due to the lack of tunnels to hide in.
There are also multiple tunnels located in between the points. Use these to move across the map, should you be unable to reach your destination directly using the Microwarp drive.
Forge
 This is another great map. For the purposes of this, we focus mainly on points A and B and I will explain why.
Firstly, point A. This is located inside a structure which is enclosed to a degree. This allows you to break missile locks and use the cover to re-position. As always, you can use the walls to your advantage in certain circumstances and any additional bonus is always welcome. Point A provides a very strong defensive advantage which I try to make use of wherever possible.
Next up is point B. The control point itself consists of a beam structure which can be used to fly through to break locks and turn around. This area has some good cover available and good use should be made of this. Located near to B is a tunnel you can use to escape, or if you are being chased and want to take the fight, you can draw them in here to give you all of the advantages we have discussed earlier.
Point C is also located near a beam structure, but this area is much more open and so you will lose the environmental advantage. I usually go to C whenever the situation demands, but make your base out of either A or B.
Necropolis
 This map is full of destroyed ships from EVE Online. In the centre is a Nyx, which provides some good spots to dart in and out of.
On this map, I like to head for point B initially. Just off to the side of this point is what looks like the ship hangar part of a Nidhoggur. You can place a drone inside this tunnel structure and the very narrow nature of this tunnel means that if somebody follows you inside, they are in a world of trouble.
From this tunnel, you can dart out to clear away any other drones or attack other players, always with the option to dart back into the tunnel for cover. I have heard this referred to as being like a hermit crab. This is very apt for what we are trying to achieve here.
The next point I like to attack or defend is point C. This is a great little spot to set up an ambush. Located just off to the side of point C is a narrow hangar type structure you can fly through, leaving a drone behind you. By remaining inside the hangar, you are in a very strong position both defensively and offensively… make use of this.
Finally, point A is located next to a destroyed ship. This area is fairly open, although there are a couple of tight gaps you can fit into. This zone is usually third on my list to attack, but will vary according to how the game is playing out.
Cathedral
 This map consists of three main areas with point B located in the middle of the large central Amarr structure.
Primarily, I tend to head for point B, as inside there is a further structure that narrows the area and provides cover. From this point you can dart out to do what is needed and come back when you need the extra cover.
The next control point I head for is point C. This is a destroyed Nidhoggur carrier and has some great spots and trenches you can squeeze yourself into, all the while providing yourself with the additional defensive benefits of cover and the ability to use the walls in your favor. It is possible to encounter some very intense fights in this area.
Point A is a Naglfar ship. This area does not provide as much cover as the other two, however if you fly around the back, there are some good spots you can use.
In general I tend to zip between points B and C on this map and visit A when needed.
Crossroads
 Crossroads is a great map. This contains my favorite hiding spot in the entire game, point A. The great thing about this point is it is located inside a cave!
As previously discussed, walls can help to concentrate damage onto your target depending on how close to the walls you can drive them, while at the same time limiting their maneuvering space.
By occupying the center of this cave, you force the enemy close to the walls as they circle you. As the circling continues, you can alter your heading to close the range of the walls. The majority of the time the enemy will not notice these slight adjustments and continue the circle fight, leading to them coming dangerously close to the walls which you can then use to your advantage.
Next up is point B. Once point A is under control, you can Microwarp drive across to B and start capturing this point. There are two main places a fight can take place here: on top of the structure or underneath, where you can use the recessed features in which to hide and once again the hostile will, usually, follow.
Standard battle rules apply here. Draw them close, use the environment to your advantage and relocate when necessary.
Once again (am I getting repetitive here?) point C tends to be more open. This point does have some broken cover to use, but points A and B are superior for what we are trying to achieve here.
Gateway
 This is my current favorite map which I have covered in a previous article and the same tactics still hold true.
The map itself is a maze of beams and structures which you can use as cover and to break locks.
Point B is the central point and has some great narrow gaps to fly through. Doing this while being pursued usually results in the hostile following you through the gap, at which point you can turn around and be ready and waiting for them to come through. Given the narrow gap, they are limited as to where they can fly and this really gives you an advantage.
Points A and C are located on the outer edges of the main structure and offer similar opportunities. Use any cover available to narrow the attack vectors your target has available and do not be afraid of using the Microwarp drive (MWD) to reposition when needed.
With regards to the MWD, I constantly see people warp off and use the max range to try and get some distance. A lot of the time this leaves them in open space in the middle of nowhere. This is a bad move since it leaves you at the mercy of pursuing attackers.
The best use of the MWD is to warp out to a structure and drop the warp. Once done, you can dart around the structure. The result is that any following attacker must also come around this corner, by which time you have already turned around and are waiting for them to pop out. Use your radar at all times in case they try to come around the structure from the opposite side.
Thanks, Nydwen. Readers, it’s a lot of information to process, but great stuff to take on. Absorb all that and you’re going to be the next New Eden legend. While you're here, why not check out our previous ProTips article showing you how to fly Support on the Gateway map.
Fly safe and, it seems, sneaky!