Welcome, one and all, to the final part of our triptych of play guides in which we help you to make the most of EVE: Valkyrie’s maps with each of the three ship classes. Having already covered fighters and heavies, it’s now the turn of the oft under-appreciated support class.
To help you improve your support game on the maps, we’ve enlisted ace support pilot and regular Valkyrie community contributor, Anska.
General Advice
Some great advice for support is to watch other players. Whether that’s in-game or in a stream, you’ll be amazed how everyone has their own play style. Armed with that information, you can work out who needs more healing or who needs help with getting to a specific point. It also means that you become aware of which points in the map players tend to head for.
Second, open space is not often a support’s friend. Play the maps in Scout Mode first to work out places you can hide, or places you know people fly through. You can then establish the best spots to deploy mines, or where you can heal without being spotted. Basically, do your homework.
Finally, as with the previous guides, I'll be using the control points in the game as reference points, so be sure to familiarize yourself with these so you can follow the guide and get your bearings.
Now, let’s get onto the maps!
Shipyard
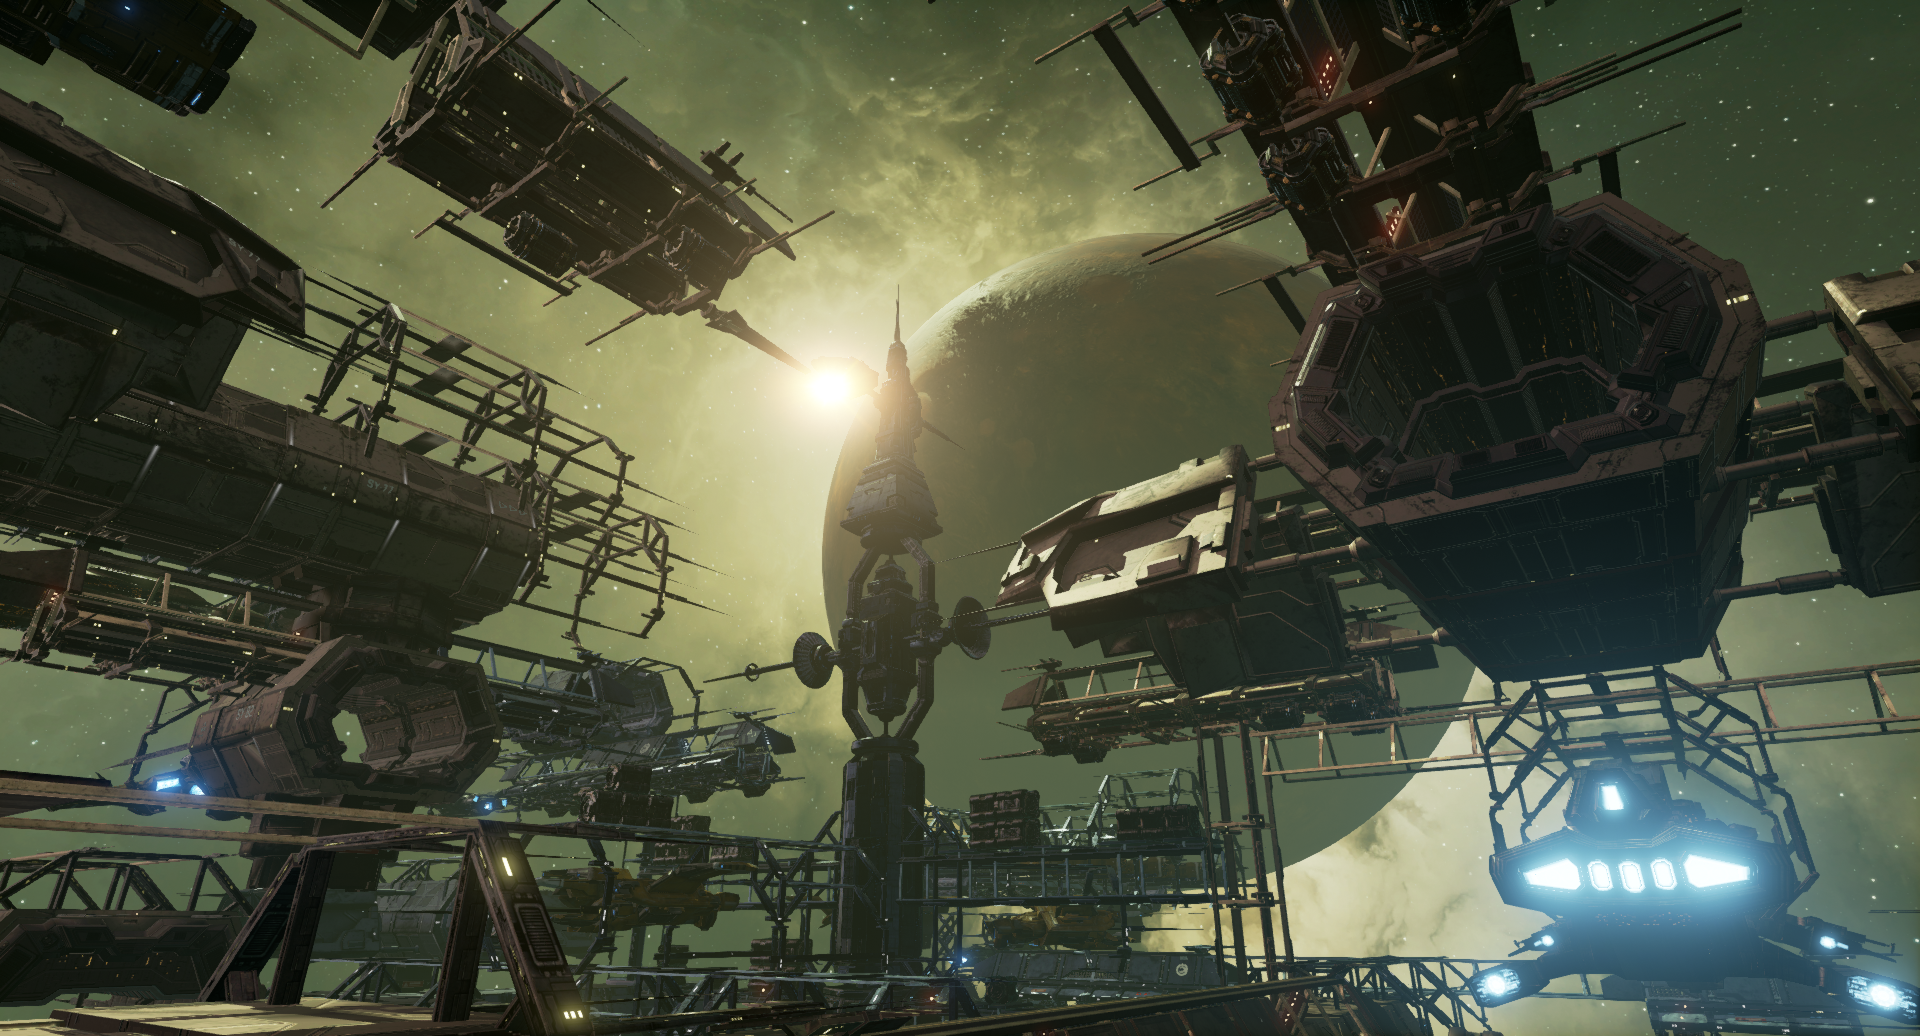 Along with Gateway, which I’ll come to later, Shipyard is one of my favorite maps. There are so many tunnels for you to fly through and many places to help you evade.
A great place to hang out is control point B. If you get control on this map, there is nothing more satisfying than going to point B and setting up a minefield to surprise the enemy. In fact, the only thing that’s even more fun is if the other team also has a minelayer and does the same. You can even do it with spiderbots, so if your team composition requires more than one support ship, definitely take the opportunity to use those.
Another useful place on this map is just after point A, where there is a little area for you to stalk in. It’s great to get those cheeky heals to teammates who are defending the point, or to deal a quick pass of damage to the enemy to help out without too much danger to yourself.
As for point C, though it can be fun, there is a lot more open space. Unfortunately, that makes it not so great for support as you are more vulnerable.
When it comes to all the tunnels, drop mines in there to damage unsuspecting opponents. Alternatively, you can lay down spiderbots at a prearranged spot that can be used as a healing station.
When playing Team Deathmatch on this map, learn the tunnels, and familiarize yourself with the many spires. They can be great way of evading attacks.
Crossroads
 Crossroads is always a fun map. The point you decide to concentrate on depends on your team’s ship loadout.
If you have a minelayer, point A is a good place to be. Look at where opponents are going in, then when you get the opportunity, lay down a minefield and have a fun game of cat and mouse as you lead them to their death. If you're attacking, this area gives you a great opportunity to duck in and out of cover to take pot shots. Do be wary of heavies hanging out in the cave, though.
Point B is pretty entertaining too. Pilots tend to focus around the top or bottom of the structure, in which case you should lay down a minefield at one end, then provoke the enemy to chase you through the structure into your trap.
Again, point C has some cover but it’s a lot more open, so be cautious when taking the fight there. Obviously, if you’re playing a healing role and the action is there, you need to be there also.
Cathedral
 On the Cathedral map, the place I most like to go as support is point B. It’s often where all the action happens. Now, sometimes it's fine to go straight in there, but it’s better to hang back, observe how the enemy ships are entering the structure, then go in to lay down your mines accordingly. You can also use the cover here to hide in between carrying out heals or assisting with an attack.
Point C on this map is another area where people congregate for a fight. It also offers some great places for support to fly between while healing, attacking or laying down mines.
This time, point A is the place that has the least cover and yet again, as support, it’s often somewhere I avoid.
Forge
 Forge is a fantastic map. However, as a support, you really don't want to stay in middle for too long (unless it's TDM and you have no choice) as it’s an area in which you are most vulnerable. This map has a lot of asteroids and pipes that are both great to hide in.
If in a chase situation, the big thing to remember on this map is that there are EVE ships moving through the spaces, and if you go full speed into one of them, you can say goodbye! Boom!
Points A ,B and C in this map have a scaffold structure near them, so unlike other maps where you may need to avoid parts, on this one map just go wherever you please. However, as already mentioned, the central area is the least desirable.
As for Team Deathmatch, this map is fantastic. If the fighting gets a bit too much, you have many places to hide in or structures to fly around when evading.
Necropolis
 Like Forge, this place is great for support pilots. It is littered with ships and wreckage, providing ample opportunity for evasion, exciting chasing and most importantly, hiding places where a support can hang out and plan how to carry out healing and attacking duties.
As fighter pilot General Stargazer mentioned in his recent map guide, there are two big EVE ships on the map, the Nyx and the Archon. The Nyx has a drone bat that runs the length of the ship; it’s a great place to get yourself out of trouble and take a breather. Similarly, the Archon has a fighter bay that’s often unused. Be sure to check out these areas.
Gateway
 I’ve covered this map in some detail in a previous article, but let’s take a look at a few of the key things to bear in mind.
Gateway is a great map for supports because of all the hiding places. The jump gates are also really good fun. The first thing to point out is that because the huge central structure is so complicated, you don’t have to hang back for fear of being vulnerable. Instead, dive straight into the action, confident that you can use the structure to hide and use the scaffolding to ditch pursuers or missiles.
The concentric ring structures around the warp gate provide lots of little channels in which to break line of sight, but they’re also good places for laying down mines.
A trick I recently learned from fellow pilot Goatan is to place mines at the exit points of the warp gates, this means that when enemies emerge from one of the gates, they get it right in the face.
Awesome stuff, Anska! Thanks for all your advice.
That’s it for the maps, but we’ll have more Pro Tips for you in the coming weeks.
Fly Safe!